However, that doesn’t mean that you can’t make an easy article easier. Let’s discuss some of the top tips that you can use to make your first Webflow websites even better.
Why choose Webflow as a platform?
When you’re a beginner, you need to take every advantage that you can get to help you get ahead. Webflow offers a whole range of different advantages that make it a platform worth considering. Some of these include the following:
Ease of use
Thanks to Webflow’s unique user interface and drag-and-drop capabilities, it’s an easy-to-use platform.
Not only does this make it easy to create the basic website design, but the platform relies heavily on a low-code or no-code approach (depending on what you’re trying to do, and how complex it is), which means that even people with little to no experience in web development can use it with ease.
Flexibility and versatility
Another advantage of Webflow is that it’s incredibly versatile, and highly flexible. As a result, users can choose between the convenience of templates, and the ease of creating something brand new from scratch.
This versatile approach means that the platform can be used with equal ease for a range of different website types. From event pages to brand websites, the options are limitless.
Easy integration with other tools
Webflow has built-in features making it easy to integrate tools or third-party apps into your website. This means that you can easily reap the benefits of multiple different tools, without having to use different platforms for them.
Simply integrate and embed your desired tools, and your website is stronger already.
A strong community
There’s a strong, supportive community around the Webflow platform, making it easy to find answers to questions, or to solve any little problems that may arise. Through Webflow-oriented forums, and the Webflow support team, you can quickly and easily bring your knowledge to the next level by tapping into the experience of others.
Cost-effectiveness and affordability
While Webflow might seem pricier upfront, it offers great value by bundling essential features, like CMS tools and built-in security, into its plans. Unlike other platforms that often require additional paid plugins, Webflow covers it all in one streamlined package, saving both time and costs in the long run.
10 Webflow tips for beginners
Now that we’ve discussed why Webflow is such an ideal platform for startups and young entrepreneurs, let’s take a closer look at our top ten tips for improving your Webflow website.
Tip #1: Use the Webflow shortcuts
Shortcuts are one of the best ways, in any kind of computer-related situation, to lessen the amount of time and effort spent on a project. Webflow offers a whole array of different shortcuts that can make it easier to complete your web design projects.
Taking the time to familiarise yourself with these shortcuts will save you both time and effort, allowing you to do more in a shorter time frame. Let’s mention a few examples of Webflow shortcuts.
- Shift + / - Opens the shortcut cheat sheet
- Shift + Ctrl + P - Opens preview mode
- Shift + A - Shows the component panel
- Alt + Click on any folder - Expands or collapses all folders
- A - Shows the add panel
- Shift + Control + S - Save as snapshot
There are many other shortcuts that may be useful, depending on exactly what you’re doing, but these are some of the main ones that may help your day-to-day operations. If you’re using a mac, remember to use the command button instead of the control button.
Tip #2: Headings & SEO
Few people realise the importance of heading structures in web-based articles. However, it plays a significant role in the overall success of your website, and each webpage.
When setting up any part of your website, always ensure that it only has one H1 heading, After that, focus on H2 headings for breaking up the rest of the article. Use HTML elements to set the headings, rather than just resizing the text to create the appearance of headings.
Your H1, or page title, should always be similar to the page’s meta title, while your other headings should contain keywords as naturally as possible, when possible. Doing so will help search engines like Google to find your page.
In fact, Search Engine Optimisation (SEO) as a whole is a crucial part of your website’s overall design. Without it, even the best websites won’t get the kind of traffic they need.
Since most web users are likely to click on the first organic result for any search term, this means that you have to pay careful attention to getting as high on the list as possible.
When you’re ready to implement Meta tags, simply navigate to the pages menu, and click on the gear icon for the page you want to edit. On the resulting page, scroll down till you get to the meta tags, fill them in, and click on ‘Save’ in the upper right corner.
Tip #3: Image optimisation and using Alt Text
Images play a significant role in the success of a web page, They can turn a drab, boring piece of content into something more. However, when added incorrectly, they can also be a resource drain and make your website load more slowly.
That’s why it’s so important to compress your images before uploading them, by using a tool like TinyPNG. Taking this additional step can help to improve loading times while maintaining the image quality.
The other important aspect in terms of images is the use of ALT Text. Alt text is a form of descriptive text used to describe what an image contains. It is used by accessibility tools who need to turn images into text for the blind or others with visual impairments.
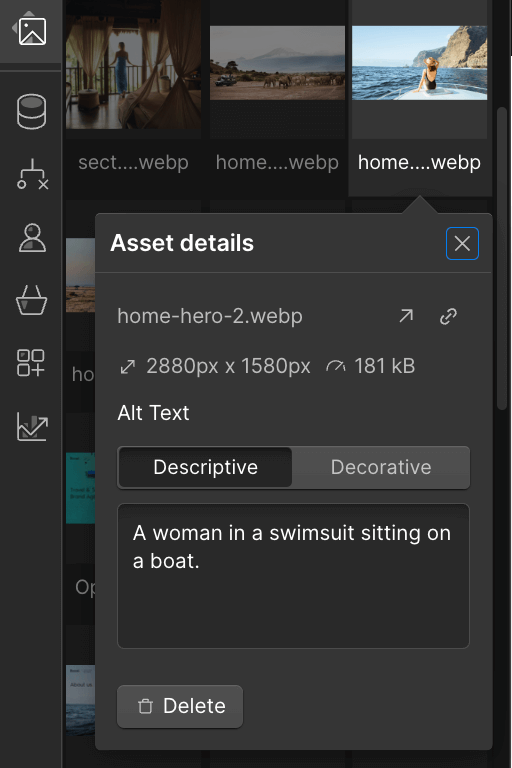
Incorporating alt text is easy in Webflow. Simply navigate to the Assets panel in the left sidebar, click the cog icon on the image you want to add alt text to, and enter your description in the provided text box. That’s it—your alt text is now set.
Tip #4: Open links in new tabs
Another excellent way to improve user experience is to set the links to open in a new tab, rather than in the same tab. Doing so will make it significantly easier for users to read your linked pages and articles without losing their place on the current page.
It will also improve the time spent on the page, which is a ranking factor that Google relies on heavily. Because new pages open in new tabs, the reader will spend more time on each page. This, in turn, can lead to higher organic rankings and better overall results.
Tip #5: Customise contact forms
If you want to have the best possible results from your website, it’s important to implement your brand’s identity throughout. That means sticking to a uniform tone and way of speaking, keeping your imagery, fonts, and colouration consistent, and giving people the look and feel they expect from your brand.
One of the ways to do this is to customise all your contact forms and error pages so they reflect your brand’s unique identity. Almost all Webflow elements are customisable, so you can extend this practice to cover most, if not all, of your website’s individual features.
Tip #6: Logo navigation
Many times people think that the logo on the homepage and in the header bar is just a way of adding some brand identity to the page. However, most of the best websites assign a secondary use to it as well.
It’s entirely possible to add a link to your logo, so that it always returns users to the homepage when they click on it.
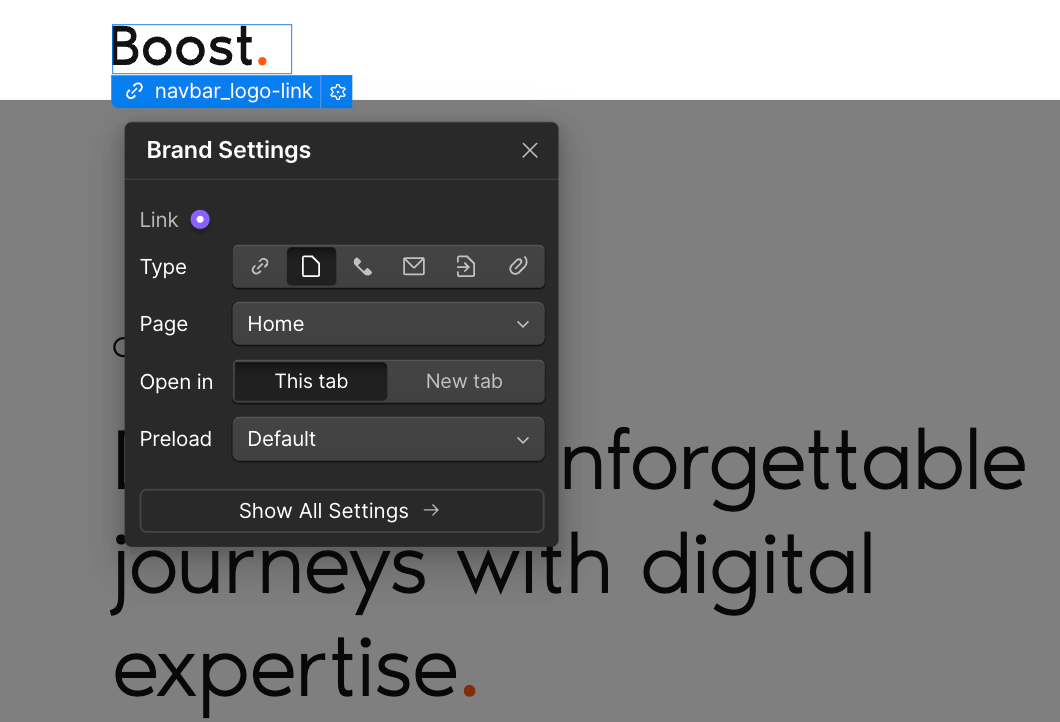
Right-click on your logo image in the Designer and select “Wrap In” from the menu. From the dropdown that appears, choose “Link Block.” Then, click the gear icon on the Link Block once it has been added to the page, and set the page dropdown to “Home.” Now, when users click on your logo, they’ll be redirected to the homepage
Tip #7: Favicon & Webclip
Favicons and webclips are essential web design elements for a range of different reasons.
The favicon is the tiny little logo or icon that appears in your browser’s address bar, making it easy for readers to recognise your website’s tabs at a glance.
Webclips are specially designed links that users can save to their device’s homepage. They usually feature the company logo or favicon, and link to a specific page on the website.
Using these tools and features can have an array of benefits, including the following:
- They help to improve brand recognition: Favicons are a great way to help users quickly identify your website. Especially on mobile devices, they’re a great way to help your users spot the windows and tabs related to your brand. When regular users see your favicon or webclip, they’ll instantly associate it with your brand.
- They help your website look more professional: By incorporating a custom favicon and webclips into your website, it adds a professional touch. It demonstrates that you've put the time and effort into your online presence.
- They can improve user experience: Favicons and webclips can also help to enhance the user experience by making it easier for users to navigate, and interact with, your website.
- They facilitate easy bookmarking: Favicons also make it easier for users to find the bookmarks they need. When users bookmark your website, the favicon is displayed alongside the title, making it easier to find later.
- They improve mobile optimisation: Favicons and webclips are particularly important for mobile users. Webclips especially make it easier for users to quickly access your website from their home screen.
How to set your favicon and webclips
Webflow makes it easy for you to set your favicons and webclips. Here’s how to do it:
- Open your account dashboard.
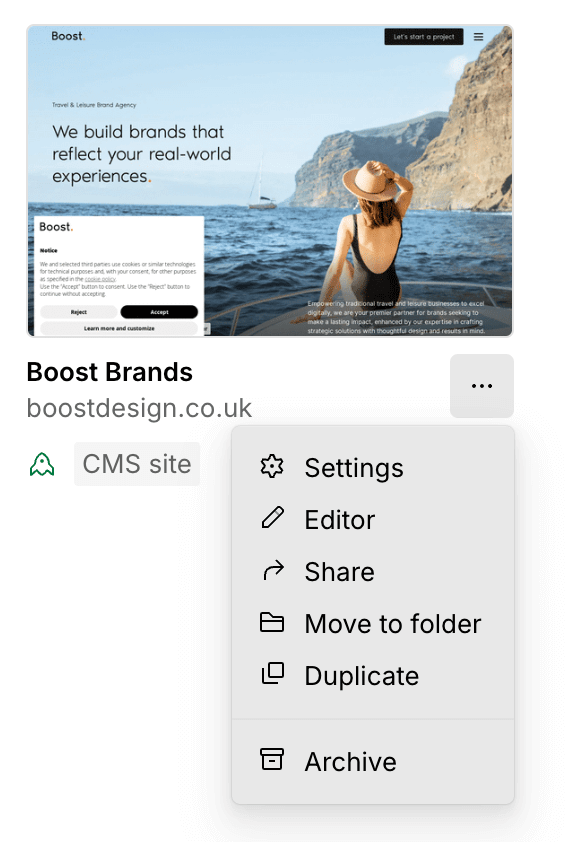
- Navigate to the website you want to edit and click on the three dots to open a menu
- Click on settings to navigate to the settings page.
- Scroll down till you get to the icons section.
- Upload both the favicon and webclips image.
- Click on save.
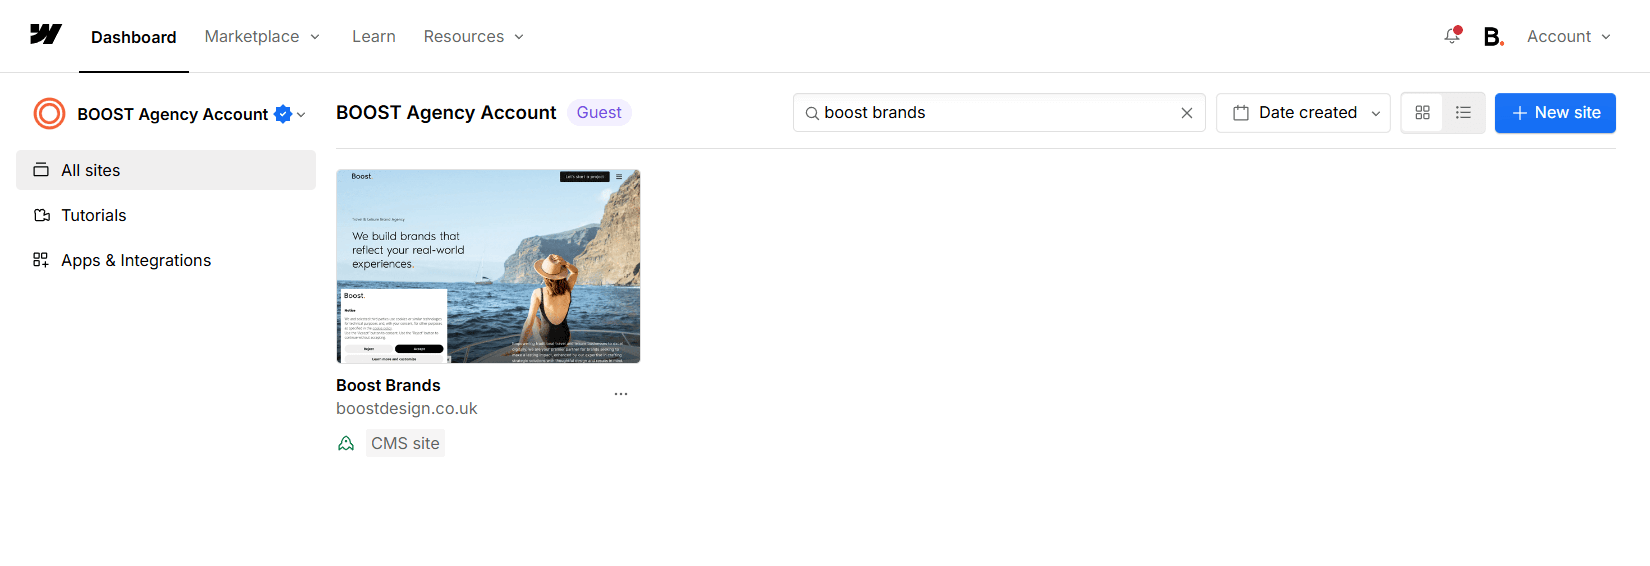
And that’s it. Just like that you’ve uploaded both types of icon for your users to read and enjoy.
Tip #8: Ensure that your navigation is user-friendly
User-friendly navigation and ease of use are some of the most essential ranking factors today. In fact, a well-structured navigation system is crucial for a positive overall user experience. ANd without good user experience, it’s next to impossible to rank well.
Here are a few tips to help you ensure that your Webflow website navigation is user-friendly:
- First, keep the navigation simple: To make the navigation as simple as possible, it’s important to avoid cluttering it with too many links. Instead, focus on linking only to the most important pages.
- Second, use clear labels: It’s essential to label your navigation items clearly and concisely so that people know exactly what they’ll find when they click on a button. Avoid using jargon or ambiguous terms in your navigation.
- Third, implement a logical hierarchy: You also want to organise your navigation items using a logical hierarchy, with the most important items at the top of any menu.
- Fourth, use consistent placement for navigation features: Once you’ve chosen where to place navigation items, remain consistent. Place them in a consistent location across all pages, usually at the top or left side of the page.
- Fifth, implement a mobile-friendly design: Today, mobile browsing is the number one source of traffic. You need to ensure that your navigation is easy to use on mobile devices. Consider using a hamburger menu or other mobile-friendly navigation options.
- Sixth, implement breadcrumbs: Implement breadcrumbs throughout the website to show users their current location within the site.This will help to facilitate easy navigation
- Seventh, integrate a search functionality: Provide a search bar to help users quickly find what they're looking for.
If you implement all these steps, you’ll be able to build a navigation system that your users can rely on to get them where they need to go.
Tip #9: Get indexed by Google
Once your Webflow website is up and running, and you’ve optimised it for SEO, you need to submit it to Google Search Console. This tool will allow you to monitor your website's performance in Google Search and request indexing. It’s a good idea to ensure that all essential articles and pages are indexed.
Why is indexing important?
Indexing offers a range of different advantages like ensuring that your website appears in Google Search results when relevant search terms are entered.
- Tracking: Google Search Console provides valuable insights into your website's traffic, performance, and errors.
- Optimisation: You can use the tool to identify and fix issues that may be affecting your website's ranking.
How to submit your website to Google Search Console:
- Create a Google Search Console account: If you don't already have one, sign up for a free account.
- Add your website: Enter your website's URL and follow the instructions to verify ownership.
- Request indexing: Once your website is verified, you can request that Google index it. You can do this by submitting a sitemap or using the "URL Inspection" tool.
By submitting your website to Google Search Console, you're increasing its chances of being found by potential customers and improving your website's overall performance.
Tip #10: Use a CMS
Webflow offers a useful, and complete, CMS (content management system) which can help to make your uploads, and the maintenance of the content on your website, much easier.
It’s always a good idea to keep your content as current as possible, though that can be difficult when you have to do everything manually. The Webflow CMS facilitates the content creation process, making it easier for you to add, modify, delete, or rotate content as needed.
Whether you opt for a website with a blog, or you just want to make it easy to change and rotate content when necessary, the options are nearly endless.
Final thoughts
As you can see, there are many different ways to improve your first Webflow web pages without going through a lot of effort. The hints and tips we’ve shared here are just some of the many ways that you can improve your website with minimal effort.
Remember that it’s crucial to keep your website well-maintained and up-to-date if you want to have the best possible success. And, if you’d like professional assistance with getting your Webflow website to pass muster, take a look at our Webflow design services. We’d love to help you.


